Dwellers
The cute fellows are the driving force behind the wheel that turns your vault. Whenever you want something done, you’re gonna use either currencies or your vault dwellers. I will not be talking about too many specific dwellers this time because there are literally dozens. So instead, let’s take a look at the general items again.
Each one of them is unique, that’s mainly thanks to their stats, abilities, perks, traits, as well as their bond. Their production stats are pretty straightforward (production of water, electricity, food, and water when assigned to a room). I’ll be mainly discussing the combat details.
Rarities
Dwellers come in different shapes and colors. Let’s talk about the colors:
- N, Normal, white, or common - useless in combat, but suitable for production. They only have a production trait that increases their output in a production room, such as the power generator.
- R, blue, rare - they’re… well, if you can upgrade them, they’ll be suitable for production, but they can be outperformed by common dwellers. There are some useful ones, like Allie, who is your first healer. You’ll be using her till you get a better one. They have a single perk for combat and one high level for production. The high-level one is a bit stronger than the common ones, but as I said, they can be outperformed because common dwellers are cheaper to upgrade.
- SR, purple, or Super Rare are the ones that are actually useful for combat. Not so much for production, but they do have 2 perks dedicated to combat.
- SSR, Golden ones, are the super great ones, usually. They have 3 combat perks, good ones.
- UR, Ultra rare, kinda glowy purple ones, which are obtainable only through Ultra Rare Redeem Tickets (which you gain through events, limited offers, and such, usually in the count of 20 - 40)
- Currently, there’s only the V.A.T.S. equipped lone wanderer Nate and the KL-E-O Assaultron, and they cost 400 tickets each
I Also Mentioned Perks

Those can be all manner of things, ranging from an active bonus to a simple stat increase. They’re also usually the description of what happens upon a dweller’s attack, meaning a sort of secondary ability that happens every single time they hurt your enemies.
Roles and Abilities
As with many other games, each dweller has a role to play in the grand scheme of things. These roles are
- Attacker: Armed to the teeth with at least a pistol, attackers are going to be your main damage dealers. Now, I use the word ‘main’ very loosely here, as all the roles are capable of dealing damage - and I’ve seen situations where support matched an attacker
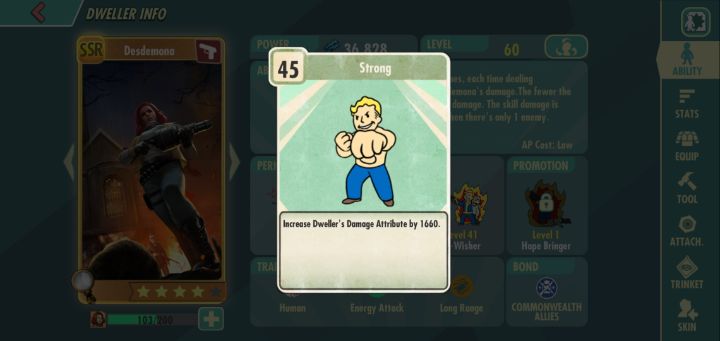
- AOE - Attacks everyone on the enemy team. A perfect example would be Desdemona or the Silver Shroud
- Single Target - Attacks a single enemy character (for example, MacCready), usually someone like a healer though - can usually reach behind the enemy lines
- Summoner - Roach King, he summons cockroaches, and those buggers (or roachers) bite. What can you do?
- Tank: These bulky fellas distract your enemies and stand in front of your other characters (usually, some have abilities that actually move them out of the way, at that point, you’d want a second or ‘secondary’ tank)
- Without going into details, generally, a perfect tank is the super mutant Strong or the Cage Fighter Cait
- Healer: Capable of healing their allies, in most cases, you’ll want at least one healer in your group
- Health: They just heal, whether it be group (Amata, Father, Carrington, Allie, Curie, Father Clifford), group per second (Marowski),
no oneSingle Target (Jack, Petty, Michelle - usually normal characters) - Radiation: Healers like Senior Scribe Neriah, Doctor Madison Li, and Knight-Captain Cade are healers capable of removing radiation from your dwellers, as well as heal them in the process. The difference between these two is that Madison removes 50% of radiation damage (max. health debuff) from ALL dwellers in your group, while Cade clears 100 of the radiation from a SINGLE dweller. Cade is also capable of healing more often. Still, Madison is usually the better choice. There’s also Amari, but she would just confuse you.
- Health: They just heal, whether it be group (Amata, Father, Carrington, Allie, Curie, Father Clifford), group per second (Marowski),
- Support: The most versatile of them all, support dwellers can buff their allies, debuff their enemies, or straight up freeze them
A squad that you usually can not go wrong with is HEALER + TANK + DPS + SUPPORT + DPS / SUPPORT. I also like HEALER + RAD HEALER + GOOD TANK + DPS + SUPPORT for events where radiation is often a factor, usually using Madison as the radiation healer. Just make sure your healer can keep your tank alive!
So, What Are Some Examples of Abilities?
Easy, I’ll give you an example for each group, just so you get the general idea of what a role ability looks like:
- Attacker: Desdemona (Level 60 Ability) Burns all enemies 4 times, each time dealing 29.8%+1100 of Desdemona’s damage. The fewer the enemies, the more the damage. The skill damage is increased by 100% when there’s only 1 enemy
- Tank: Tom (Level 1 Ability) Tom gains reflection for 9 seconds, returning 50% damage taken + 2% Tom’s Max HP as pure damage, Tom’s physical and energy resistance increase by 24%+26
- Healer: Madison (Level 50 Ability) Places a Medical Robot to heal all friendly units 2 times, each time healing the amount of HP equal to 198.1% of Madison Li’s damage plus 2029 extra points, also removes 50% of their radiation.
- Support: Nick (Level 56 Ability) Uses the Cyolator, dealing 223% of Nick’s damage plus 2785 additional damage to all enemies. It also increases enemies AP generation by 30% and freezes them for 2 seconds.
Each ability comes with an AP cost. Action points are gained by the dweller when they use their normal attack. You can upgrade abilities the same way you would upgrade equipment. More about that later.
Yeah! Fighting Is Cool! What about Some Stats?
First off, each dweller has a level (you can raise that by forcing food down their throat, remember?), and they gain a stat boost with each level up. This is determined by their SPECIAL set.
Strength determines the extra damage they gain, Perception plays with their hit rate (also known as accuracy). Of course, Endurance affects the maximum HPs (or hit points). Charisma approaches resistance, Intelligence defense. Agility increases dodge chance and last, but not least - Luck grants them an extra chance for critical hits. Additionally, Dwellers have varying attack intervals (usually 3 - 4 seconds) and critical multiplier, a.k.a. the damage their critical hits do (Usually 150% - 200%)
What Are Those Little Traits They Have?

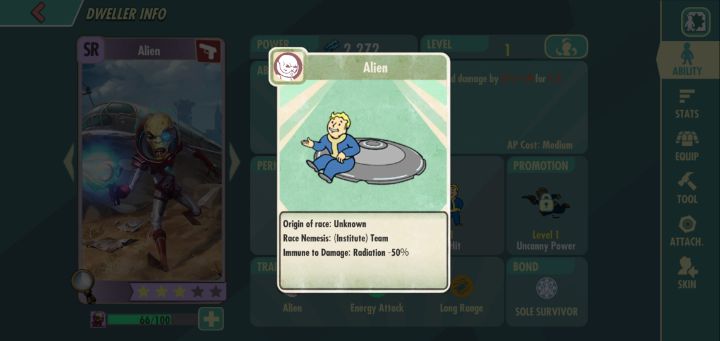
First off, there’s race that determines how well they go with/against other races. Anyways, next, we have the type of damage - either physical or energy - which each cater to either energy resistance or physical resistance.
There’s a trait that tells you how close (combat range) they’re gonna get to their enemies. Also, the position where they should stand in combat.
- Close combat, mid-range, and long range. If someone, like Cross, wields a hammer, they’re gonna deal lots of damage, but they’re gonna be exposed.
- Mid-range ones go right after tanks (close range), usually the support or a healer.
- Finally, you can have a long-range character, which is usually the attacker.
And the BOND???
A JAMES Bond grants the character in question a special bonus if more characters have the same bond in the group. Think of it as if it were a faction. Because it is.
If you have all 5 characters in your squad with the institute bond, they’ll get +15% damage to humans, +10% physical damage reduction, as well as some additional bonus damage reduction if they’re all full-star (more about stars later)
Now, How Do You Upgrade Equipment, Tools, and Abilities?

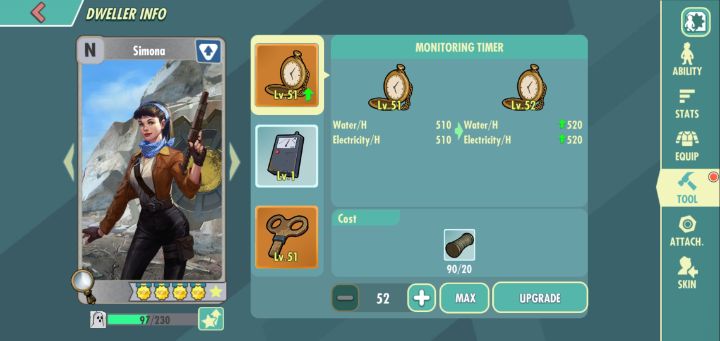
First off, abilities are always the first item in the EQUIP screen. Second off - tools require no caps and are usually cheaper.
Now, each upgrade requires a certain amount of resources. This can be as little as 4 or as much as a hundred; it really depends on how high level you are. Materials are generally gained through missions, huge battle ones. Another great way to earn 30 materials of the appropriate level for you are daily challenges; they’re unlocked after a while into the game. Beyond that, the Mysterious Treasure location can yield lots and lots of resources, but more about that later.
Another dweller-related item is the attachment screen. I think that’s better left for a separate article, though. Let’s just say attachments are pieces of armor that you can equip your characters with, increasing their stats and giving them unique bonuses and/or additional abilities… oh, look, someone’s standing in front of your vault!
So, How Do You Get Dwellers Anyways?

Each dweller is recruited through the use of posters. An SR dweller requires 30 posters, while an SSR one requires 80 to be recruited. You needn’t get them all at the same time; they go straight to your inventory.
Posters are located within some missions (for example, every HARD task on the map will net you at least one SR dweller poster), can be found randomly in any mission at all, bought in any of the Dweller Pools for Gold Vault Tokens (gained as rewards or purchased) in the Super Duper Mart, or for Pre-War Cash, also in the Super Duper Mart. You may also gain posters through a guild, factions, dailies, etc. So… yeah, there’s a lot of ways to get dwellers, even if you don’t pay a dime.
You may also rarely (or when you draw 10 items at a time from any of the pools) get an entire dweller. However, if you happen to gain that once you already have the dweller, you’ll get the equivalent of what it cost to recruit them in the first place. So, for example, if I own Strong and draw a full Strong, I’ll get 80 posters instead of another Strong.
What Happens If You Already Have a Dweller, and You Gain Their Posters?
Well, the dwellers’ journey doesn’t end with recruitment. Each one of them can be upgraded; that’s what we call stars and medals. An SR dweller starts off with 2 stars, an SSR with 3. To upgrade an SSR dweller, which costs you 80 posters, you’ll need 100 posters, 200, then … oh, you get the idea. Once your dweller reaches 5 stars, you will need promotion certificates in addition to posters. Those are gained mainly from limited events. They’re separated based on rarity (Orange Promotion Certificate is used for SSR dwellers and so on).
You’ll also unlock an additional perk once your dweller reaches 3 medals or more. That’s where the common dwellers really shine compared to Rare ones; at 3 medals, they gain an additional few hundred production units. Sure, rare ones do as well, even more, but those are a pain to upgrade… let’s say you get 300 Brotherhood points a day; that’s enough for 7.5 posters of Scribe Haylen. You could run a single mission of a normal difficulty to get 4 posters of Simona. That mission can be swept through using Nuka-Cola Cherry and Rad-X up to 15 times. That’ll net you 60 posters of Simona, while you still have only 7.5 Haylen posters a day. See where this is heading?
Now, aside from the perk at 3, 4, and 5 medals, each time you upgrade a dweller with an additional star or medal, they boost their stats. Both production and combat.
Also, some dwellers unlock a trinket once they reach 4 stars (not all of them!), but more about that some other time.
Is There Any Point In Owning Dwellers You Don’t Use?
Yes, at the very least, you can climb into the Dweller gallery and unlock some small boosts to all of your dwellers. Hey, 3 - 20 power might not be much, but if you get that 20 times, it’s 60 to 400… and that’s 300 to 2000 power if you count your entire 5-man squad!
Additionally, unlocking a dweller who can have a trinket allows you to claim a 100 Nuka Cola Quantum bonus in the VR Room.
And Then There Was One
Now that we’ve gone through each vital piece of information, we can fully understand POWER. Power is a numeric view of all the stats, perks, equipment (not tools), trinkets, medals, and who knows what. Power tells you how ‘powerful’ a dweller is in combat. Still, beware… higher power doesn’t always beat lower power. It’s all about the team combination. A group of 120 000 power may very well win over a group of 150 000 or a single character or 200 000 if the composition is just right.
A great way to increase power is to upgrade attachments. Your dweller can wear 4 attachments (head, torso, hands, and feet), and that can net you, even at the lowest level - assuming you upgrade them to level 60 - 2688, 4032, 6112, or 9120 power. Based on the rarity, 9120 being four level-60 SSR attachments, of course. This can be boosted even higher once you gain access to tool remaking.
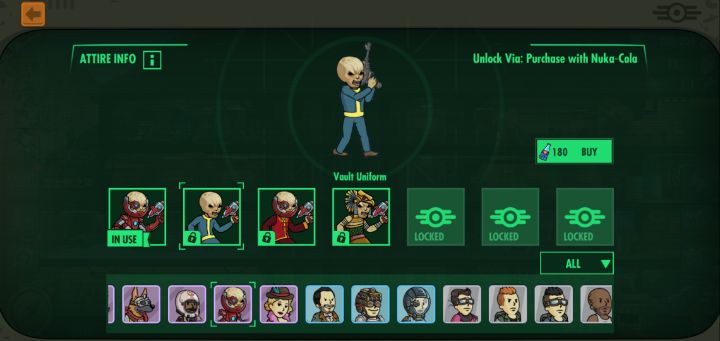
Be sure to dress your dwellers appropriately in the SKIN tab!

